Installing Portainer on your home lab


If you followed my last blog you now have Docker installed on your Ubuntu Home lab server you will want to create some Docker containers.
In this blog, I will show you how to install Portainer so you can manage the container you create.
Portainer is a powerful web-based Docker management system that provides a convenient graphical user interface (GUI) for managing your containers, images, volumes, and other Docker resources. It simplifies the management of Docker containers, making it accessible even if you’re not a command-line expert. Here’s what you need to know:
What Is Portainer?
Portainer started as a GUI for Docker but has expanded to support several other container environments.
It has more than 1 million users and over 22,000 GitHub stars.
Two versions are available:
Community Edition (CE): The free and open-source version. This is the version we will be using, and the
Enterprise Edition (EE): A paid version with additional features.
Key Features of Portainer:
Graphical Interface: Interact with your containers, images, and volumes visually.
Multi-Endpoint Support: A single Portainer instance can connect to multiple Docker hosts.
Beyond Docker: Supports other container environments like Kubernetes clusters and Azure Container Instances.
Installing Portainer on Ubuntu Using Docker Compose:
Although not required to use Portainer, Docker Compose is a popular utility that makes managing containers easier.
Here’s how to set up Portainer using Docker Compose:
Run Portainer container
You can create a Portainer by running a Docker command like below or from a compose file. I prefer to run this as a compose file. here is my example code.
docker run -d -p 9000:9000 --name=portainer --restart=always
-v /var/run/docker.sock:/var/run/docker.sock
-v portainer_data:/data portainer/portainer-ce
Here is an example of my docker-compse yaml. Copy this file to your server in your docker. If you have not created a Docker Directory, create one in Home directory. This will be used in all future blogs.
You should set up your file system like so:
See my previous blog for more details

/home/user/docker-compose
├── docker-compose.yml
├── portainer
│   ├── data
│
├── Another_container
│   ├── data
│
└── .env
version: '3.9'
networks:
backend:
external: false
volumes:
localtime_volume:
portainer_data:
services:
#Portainer
portainer:
image: portainer/portainer-ce:latest
container_name: portainer
restart: unless-stopped
ports:
- 9000:9000
# security_opt:
# - no-new-privileges:true
networks:
- backend
volumes:
- localtime_volume:/etc/localtime:ro
- portainer_data:/data
- /var/run/docker.sock:/var/run/docker.sock
#ANOTHER CONTAINER HERE
#example
#image: example
#...From the top let's explain what this code is doing.
Version: The version: '3.9' line specifies the version of the Docker Compose file format being used. In this case, it’s version 3.9. Each version introduces different features and syntax, so it’s essential to choose the appropriate version based on your requirements.
Networks:
- The
networkssection defines named networks that services can connect to. In your file, there’s a single network calledbackend.
By default, Compose sets up a single network for your app. The network is named based on the project name, which is derived from the directory where yourdocker-compose.ymlfile resides.
In this example I am using the Network called backed, In later tutorials I will create additional networks, eg Frontend,
Containers on the same network can communicate with each other using the service’s name. So in this example, users connecting to the frontend network will not be able to connect to the private backend. - The
external: falsesetting means that thebackendnetwork is not externally defined (i.e., it’s specific to this Compose project).
Volumes:
- The
volumessection defines named volumes that services can use for data persistence. These volumes will be referenced in the container services section. - In your file, there are two named volumes:
localtime_volume: This volume is likely used to share the system’s local time with containers.portainer_data: This volume is used by theportainerservice to store its data.
In this example I am using Volumes that will be sotred in the Docker enviroment, but you can also store these config files and data on your local profile storage.
In this case i changed the files paths so they will be created in the same location as the Docker Compose file.
    volumes:
      - ./localtime_volume:/etc/localtime:ro #this will save the volume in the same location as your docker compose file.
      - ./portainer_data:/data
- /var/run/docker.sock:/var/run/docker.sockServices:
- The
servicessection defines the individual containers (services) that make up your application. - Details about the
portainerservice: image: Specifies the Docker image to use for this service (in this case,portainer/portainer-ce:latest).container_name: Sets the name of the container toportainer.restart: Defines the restart policy for the container (in this case,unless-stopped).
This means that the container will restart when the server is restarted.ports: Maps the host port9000to the container port9000.
You can amend these ports if you wish, but do not assign port 80 or port 443 to this container.networks: Connects theportainerservice to thebackendnetwork.volumes: Mounts thelocaltime_volumeand/var/run/docker.sock(Docker socket) into the container.
Comments:
- The lines starting with
#are comments and are ignored by Docker Compose. They provide additional context or explanations for the configuration.
Overall, this Docker Compose file sets up a Portainer service with appropriate configurations, including volume mounts and network connections. When you run sudo docker compose up, it will create a Portainer container based on the specified image and configuration. 🐳
Accessing and configuring Portainer:
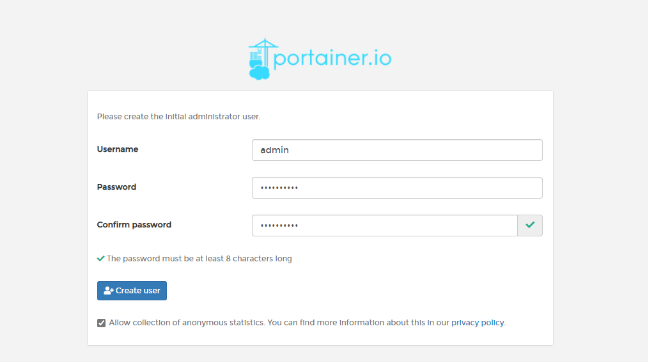
Visit http://<THE IP FO YOUR SERVER>:9000 in your browser.
Where you will be able to set up your initial user account.
Remember to change the username. It's a good cybersecurity practice not to use a root or admin username.
From here you connect to your environment.
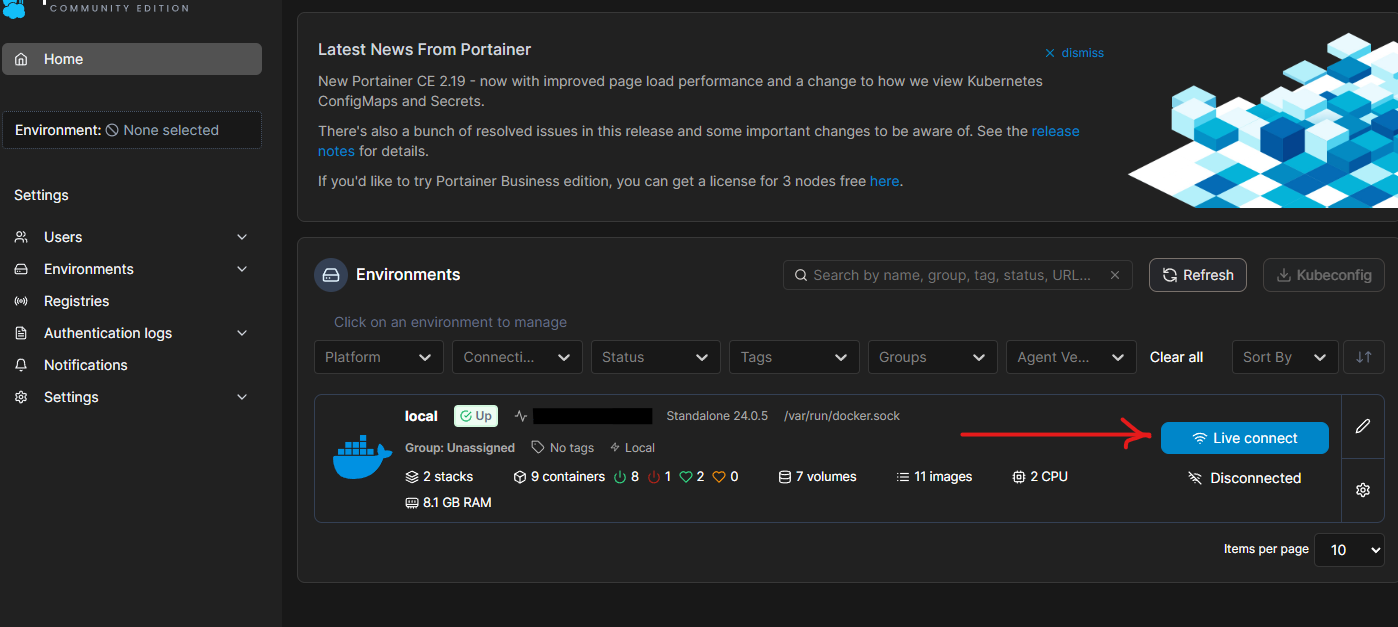
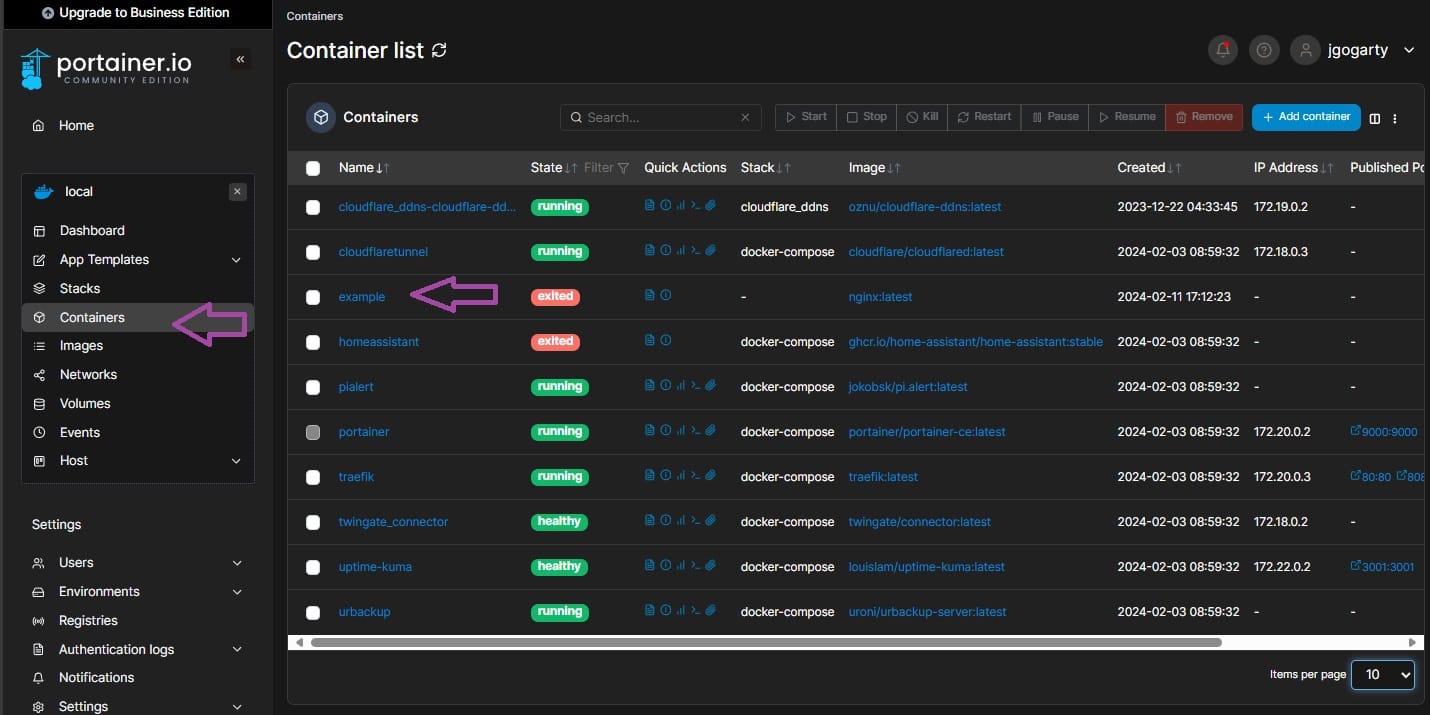
You can then click on Containers on the left-hand side menu to see the containers that are running.
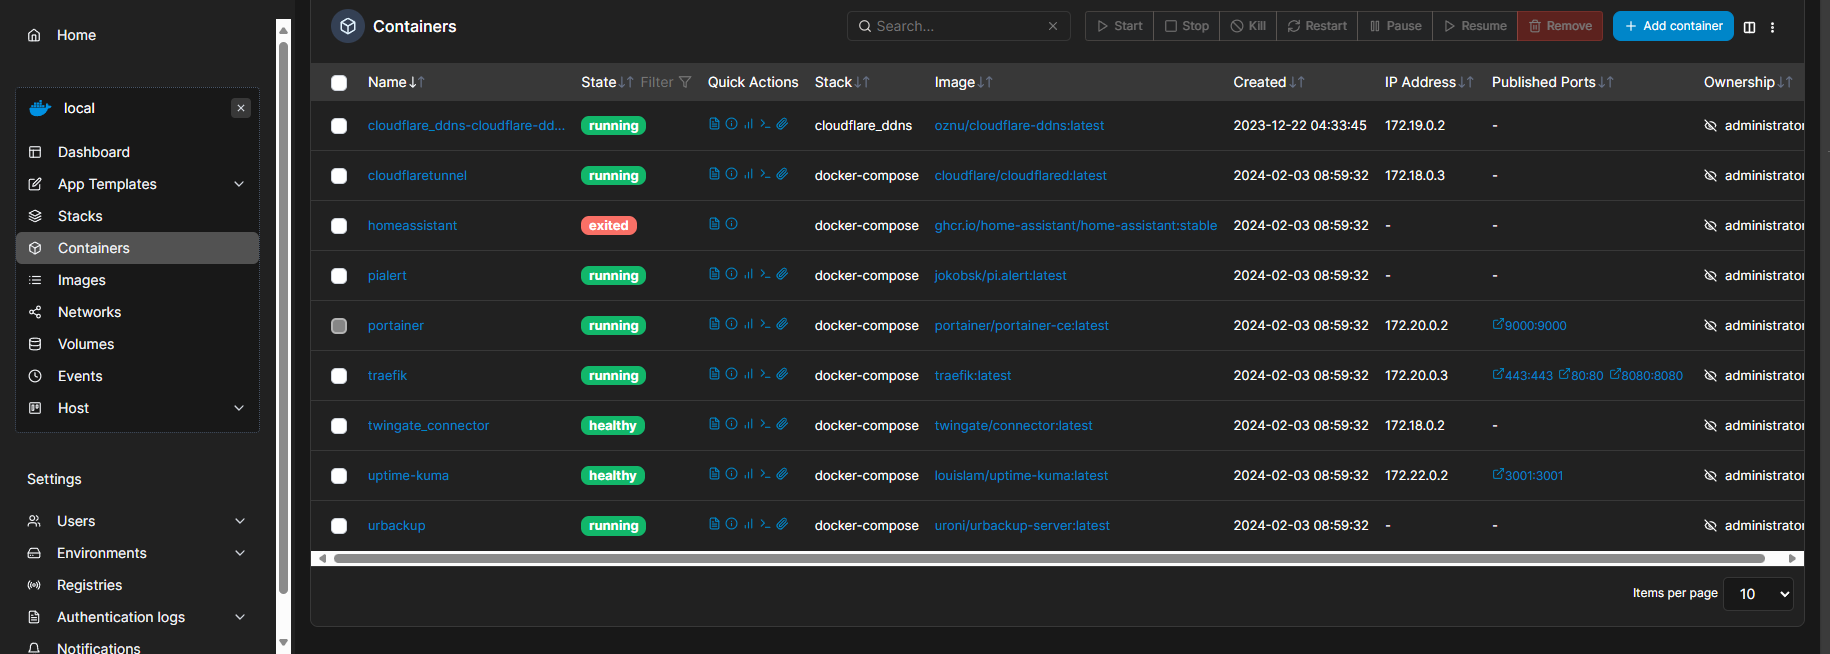
As you can see you can have multiple containers running on one server.
The max will depend on the resources that are available to you.
Note: in these containers, resources are dynamically assigned. In later blogs, we will talk about assigning resources to containers.
On the top right-hand side, you can also now create containers from portainer directly.
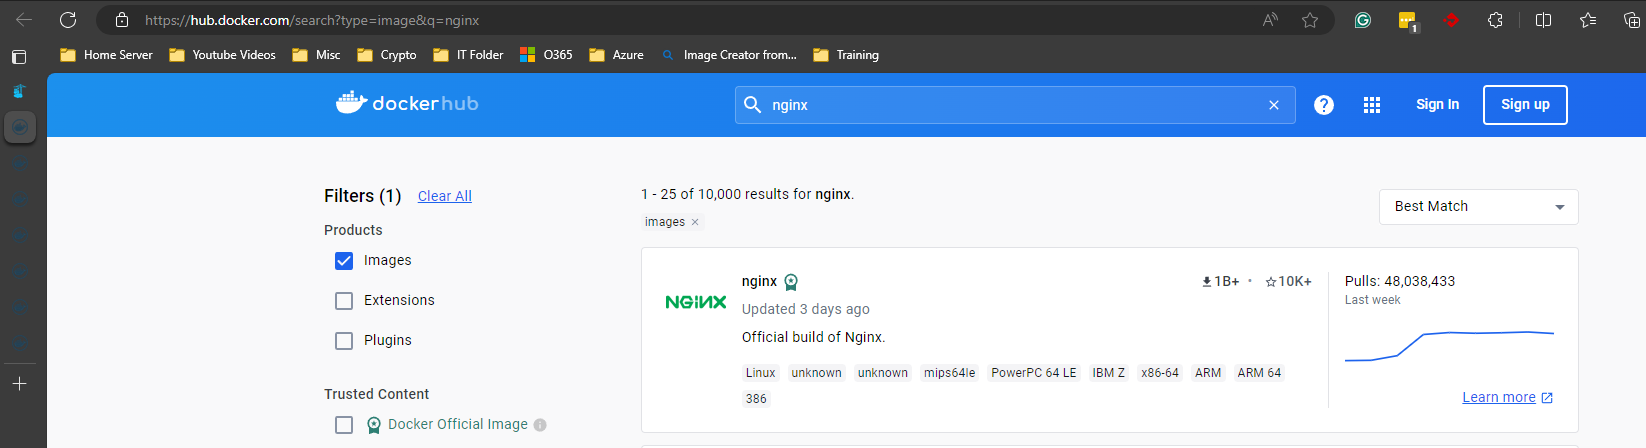
You can click on the "Search" button and this will bring you you to Docker Hub, where you can search for popular containers.
In this example we are searching for Nginx

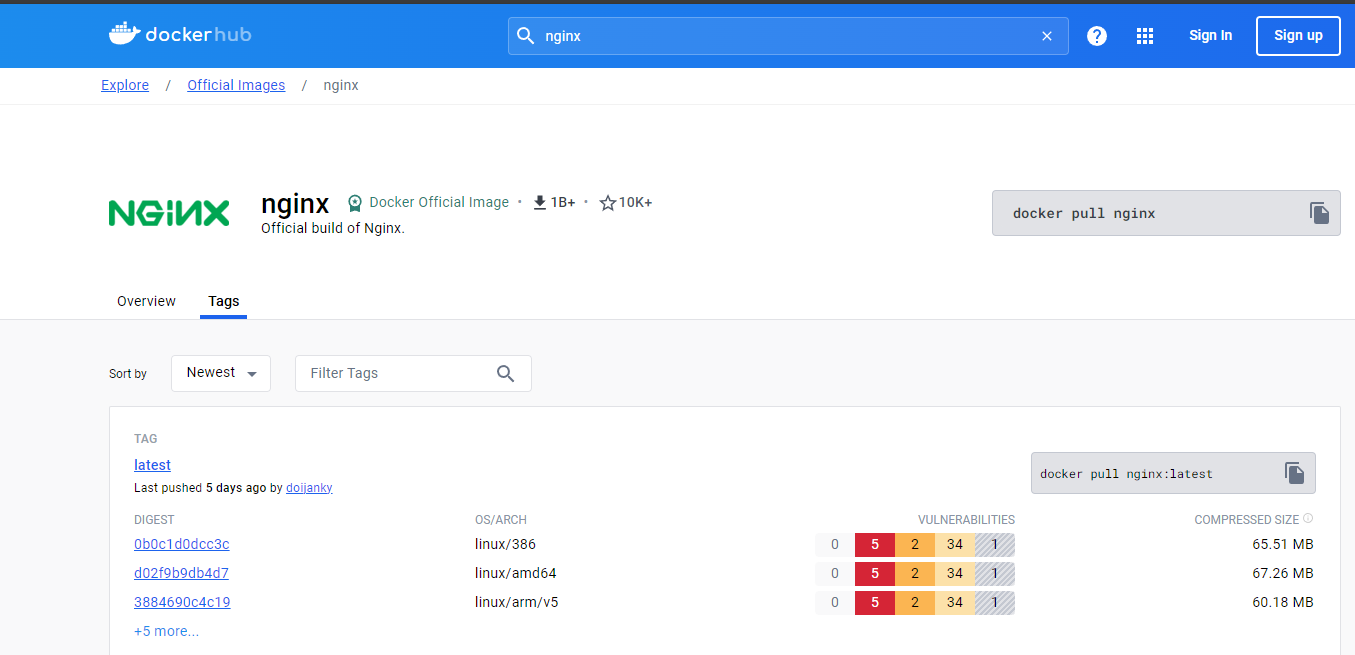
When you find the container, you want to click on the "Tags" tab. This will give you a list of all the interactions of the container you are looking at.
Most of the time, you will want the "latest" version.
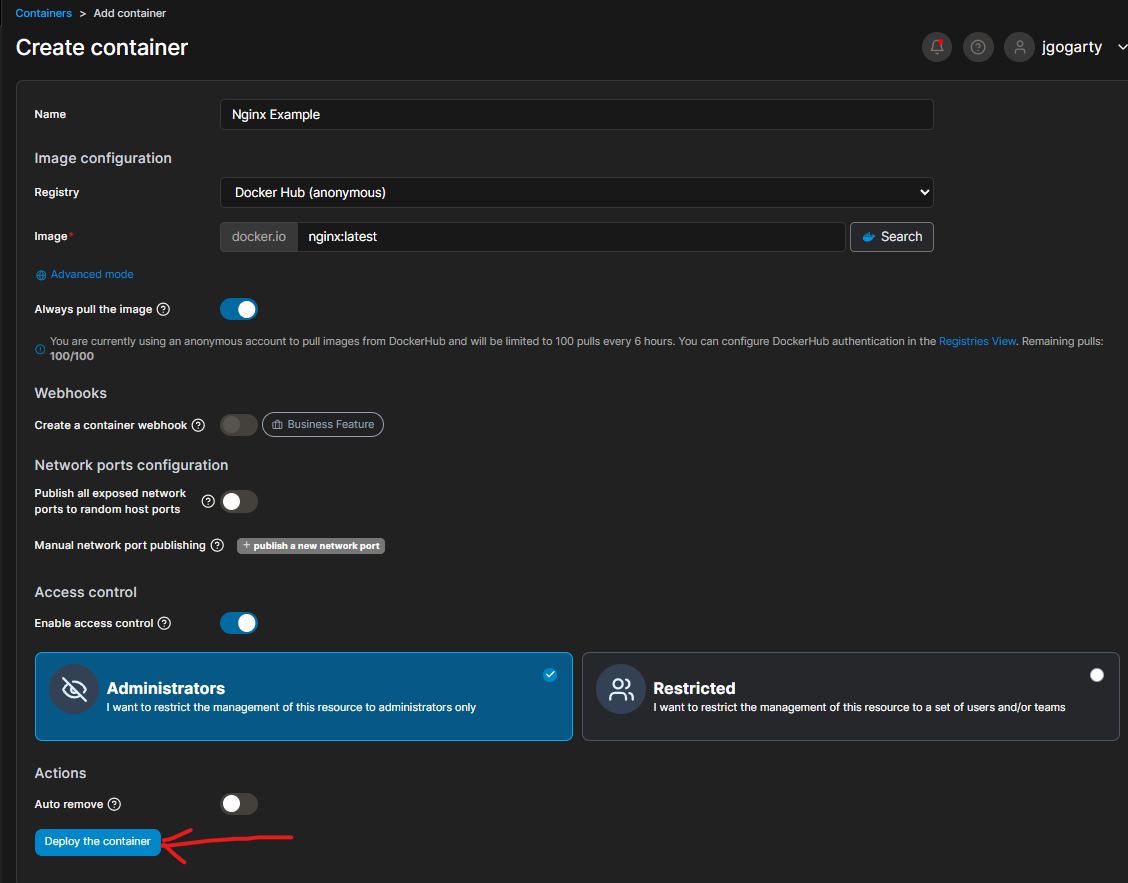
After you create your container, you might have to update it. You can do this by recreating the container with the 'sudo docker compose up—d' command.
You can also pick a stable version and later update it with the new build you prefer.
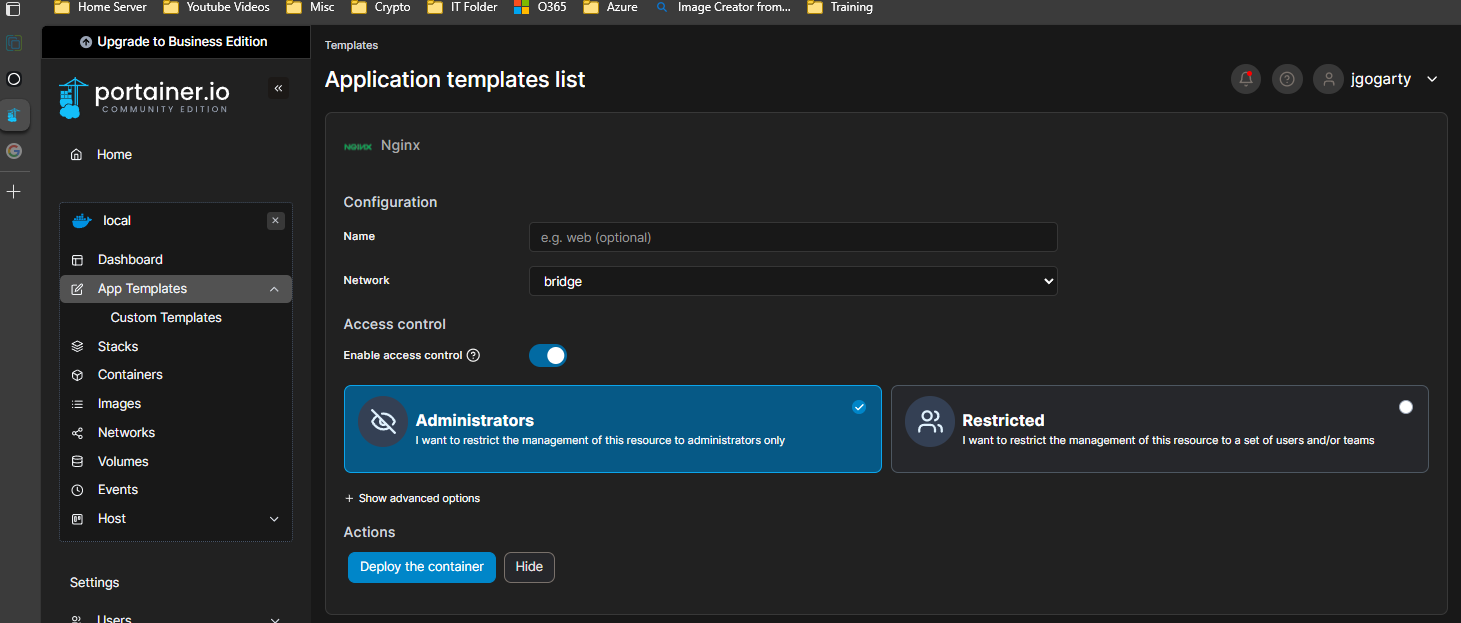
Add in the name of the container you want to install. In this case you want
nginx:latest
Then click on Deploy to create your container.
To view your container click on the "containers" side menu and then click on the container name you just created.
From here you can see the settings applied to your container and from here you can also check the logs to verify the container booted, open a console and interact with the container via a Bash terminal and
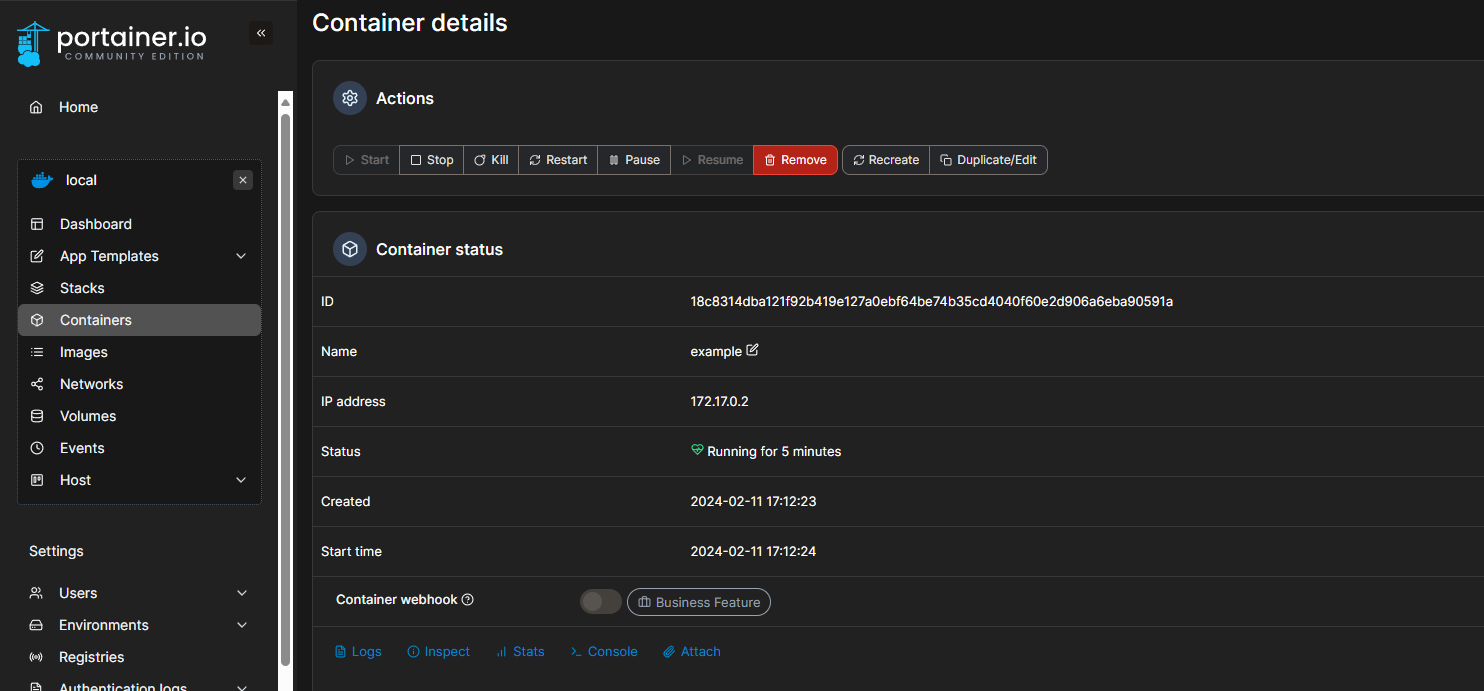
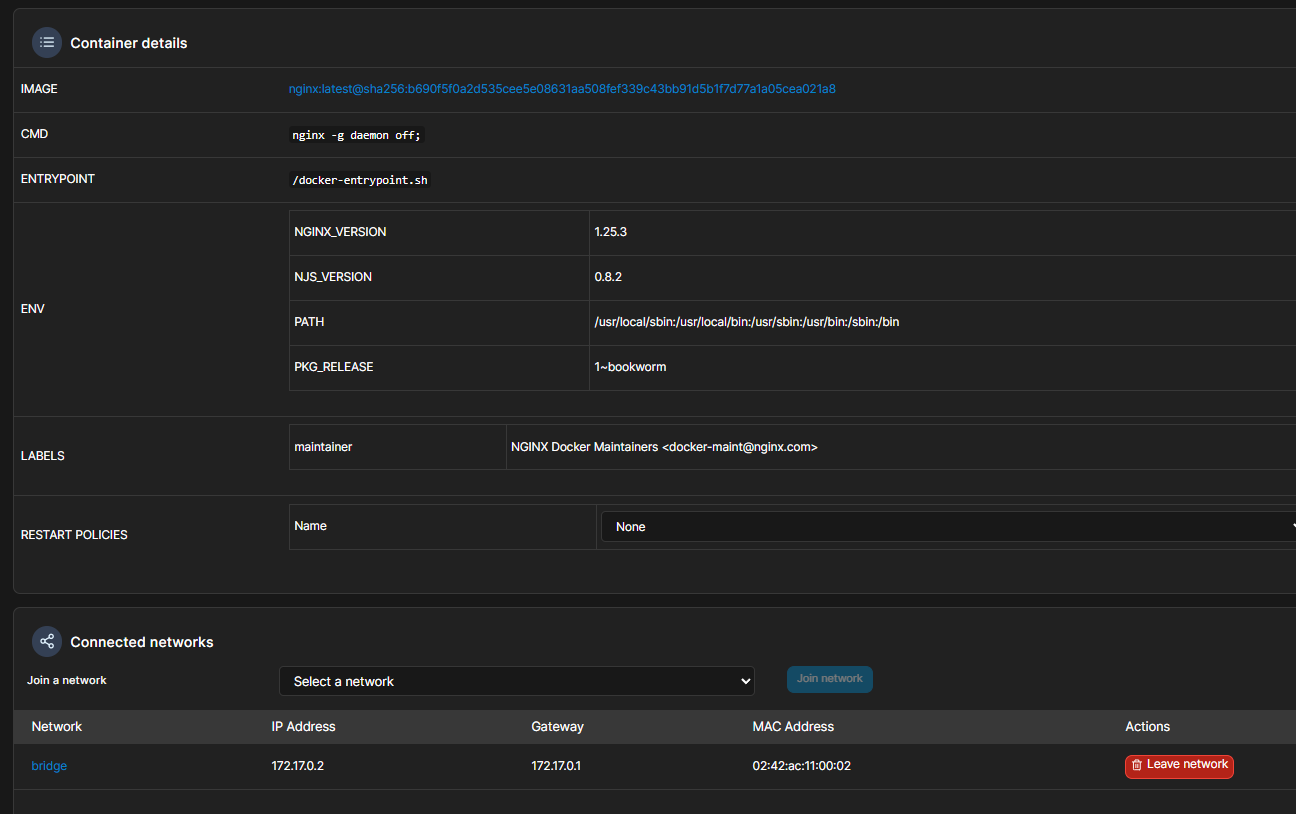
Lower down on the page you can also see more container details such as the Restart Policy and the Connected network.
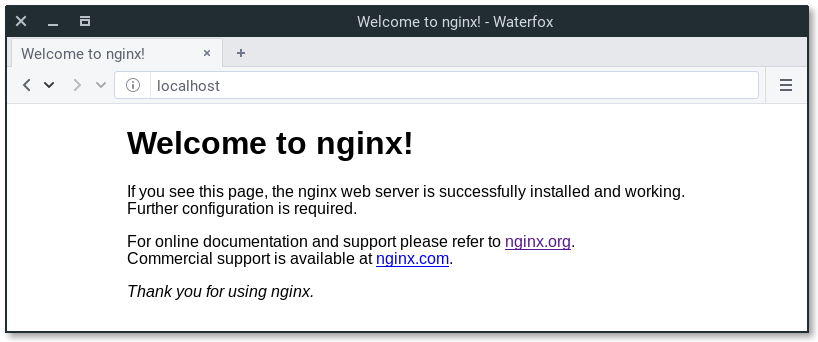
You can not visit this site via the ip of your server
https://<YOUR_IP>
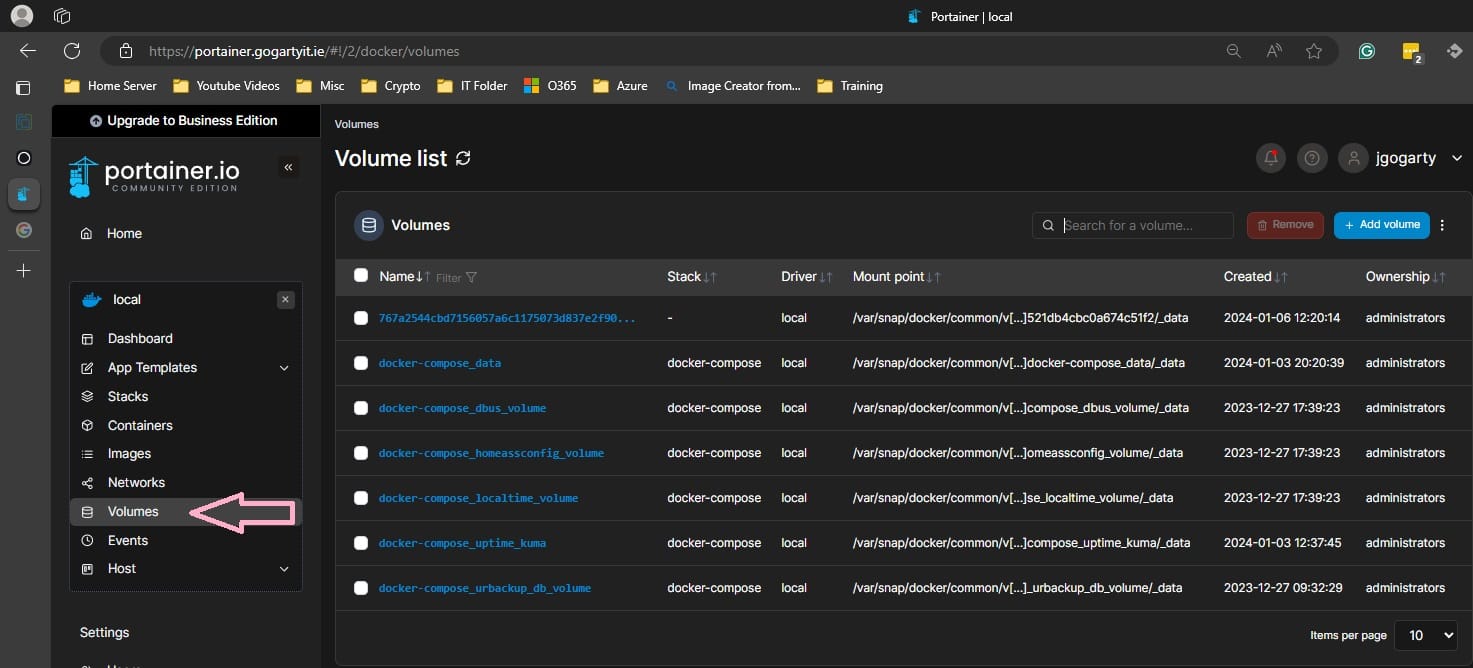
You can also look at the volumes you created for Portioner and nginx by clicking on "volumes" on the left-hand side menu.
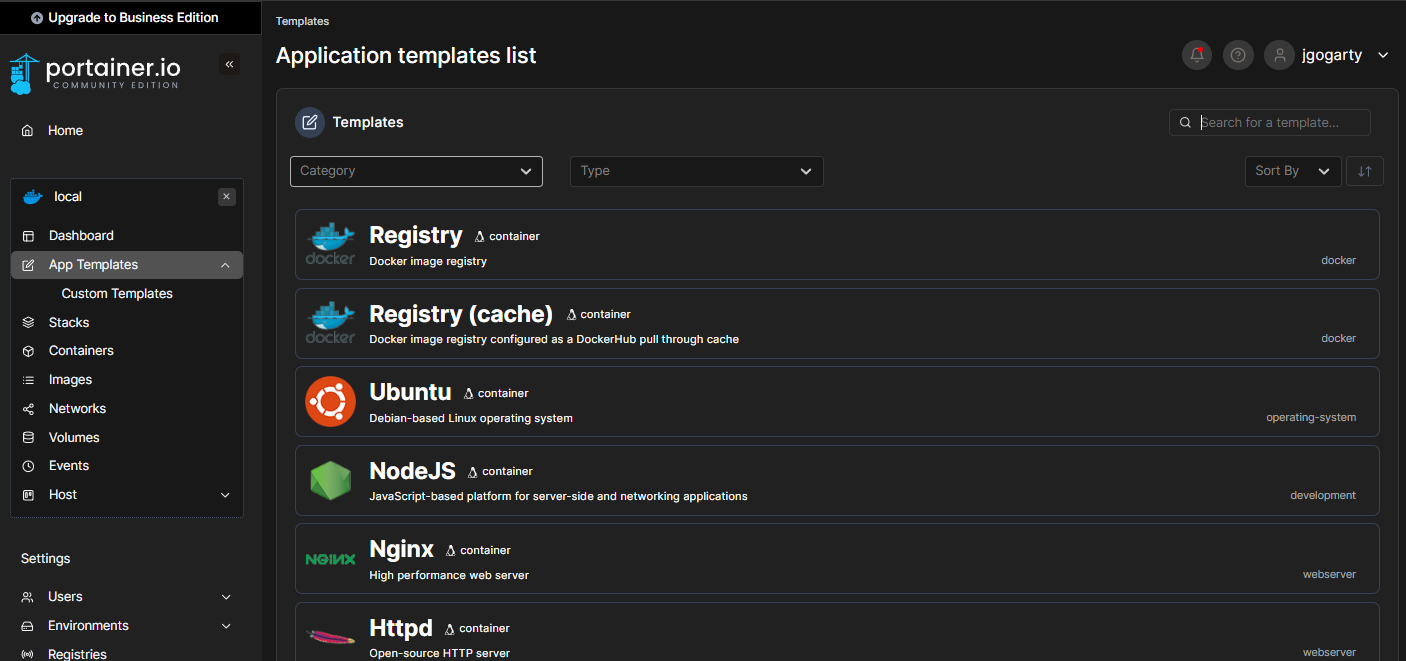
One final thing you can also create a container from the "App Templates" on the left-hand side menu.
There is a limited list of popular templates that you can click on and install for faster deployment of testing containers.
Recap
This blog post explains installing Portainer, a web-based Docker management system, on Ubuntu 20.04 using Docker Compose. Portainer provides a graphical user interface for managing containers, images, volumes, and other Docker resources. The blog post walks through creating a Docker Compose file, running the Portainer container, and accessing and configuring Portainer in the browser. I also discuss creating and viewing other containers using Portainer, such as Nginx. The blog post is intended for beginners who want to learn or are just interested in using Portainer to simplify the management of Docker containers.
The next blog will look at Traefik to secure website traffic on your containers.

For more blogs on Docker Projects, visit my Docker Blog page.
Explore my other tutorials and how to here.